


I'm so happy to say our Save the Dates have been created, mailed, and are securely now hanging on everyone's fridges I'm sure :) But really, Travis & I are so lucky and feel so blessed to have the opportunity to share our special day with so many of our friends and family.
Here it is...
 ...it's a little hard to see the colors because this is a scan of one of the cards. I had the cards printed on a linen cardstock, which I really love.
I've received MANY compliments on our Save the Date cards, so I figured I'd go through a step-by-step of how I created them (or, had them created I should say...) Here was one inspiration I had from Martha:

My initial goal was to make them myself. That idea lasted about ten minutes once I realized how much work that would involve. What I liked about the above picture was the finger STD with the knot. This incorporates nicely with our Invitations. I also liked that it looked vintage-y (is that a word?) with the image, but more modern/contemporary with the type/fonts.
Since I wasn't about to try and tackle designing these myself, I started looking on etsy. I knew I wanted to incorporate a picture from our engagements, and I knew I wanted our cards to coordinate with our invites, so the search began. I stumbled upon Announcing You, and loved Amber's work. The card I saw which grabbed my attention was this Movie Poster Save the Date.
 (Side note: this girl must be really confident in her feet/pedicure to have the focus right there) Okay moving on...
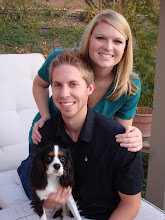
I emailed Amber, told her I loved the design, loved the price even more, and had her design me a proof. It was perfect. Travis chose the picture for us to use from our e-shoot, and I really like the way the black and white turned out. Here's the picture he chose for us...
 Amber incorporated our colors, the fonts from our invitations, and had them printed and mailed before I knew it. Amber was so great to work with that my mom and I used her services again for a retirement party invitation. She's amazing!
All in all, I payed a total of $85 for our Save the Date cards - I think I ordered 70 of them! This included the design fee, printing, envelopes, and quick shipping! HELLO! No brainier!
After receiving all the STDs in the mail, I got to work on lining the envelopes. THIS was quite a task - but I think well worth it. I took the pattern we're using to line the envelopes for our invitations, and it color copied at Staples. They were also amazing to work with - and put up with my many changes..."Can you make it darker?" ... "Oh, too dark, a little lighter?" ... until it was perfect. Thanks for your patience Staples copier lady!
Here's an example of some other beautifully lined envelopes...you see these all over the blogs. A little detail, which is very time consuming, but SUPER easy and looks great.
 I posted a video that I found to teach you how to line an envelope. All you need - a good glue stick (I bought a super strength glue stick at Michael's), a bone folder (Martha! a must!), good scissors, and some patience.
To address the envelopes, I used my printer from home. I incorporated the same fonts which we used on the actual Save the Date, and the invitations.
Overall, I was VERY happy with how they turned out! Like I said, I was so happy to hear all the compliments from our friends and family!
Thanks again to Amber from Announcing You on Etsy and of course, He & She Photography! Check out their amazing new blogsite!
No comments:
Post a Comment